Showing posts with label Alexander Henry. Show all posts

Sunday, 17 August 2014

#WIP First Quilt


I've never made a quilt before. I have always wanted to as there are so many lovely designs out there but never got further than the planning stage. 

Then last month a new magazine came out. Quilt Now. 


The projects are so much more modern than the other magazines I've seen. I really love heart shapes quilts so the project Rapture really caught my eye. 


The project uses Art Gallery fabric range rapture which are nice pastel type colours. I had a bag of Alexander Henry scraps from a friend of my mums that I wanted to use on a big project. 

Last week saw me and mum head off to Birmingham for Festival of Quilts where we purchased a Sizzix machine. We had been talking about getting one for ages and one stall had a great offer so we did. Cutting out squares is so much quicker this way!

The pattern uses 3 1/2" square but as we only have a couple of dies I went for a slightly smaller quilt and used the 2 1/2" square. Still looks good though. 

Last night whilst watching TV series Under The Dome I cut out the squares to make my quilt. 


Not all the squares are laid out in this picture as I ran out of room. 

I debated using some plainer fabric for some of the squares to break up the patterns but I really like how busy it is and against a white background I think it will stand out even more. 

Today's task is cutting out the 200 odd white squares. Once that's done the fun can really begin. 

Quilt Now first edition came with a beginners guide to quilting which will definitely help me with this project. 

Here are pictures of the fabrics I chose. I'll post more once I've made some progress. 


Friday, 18 July 2014

Sew Together Bag

A regular topic that often pops up on Instagram is the #sewtogetherbag, with pictures of people's work in progress (#WIP). If you go search the hashtag you will be amazed at the number of people that have sewn this bag or are currently trying to. 

All the pretty pictures inspired me to have a go myself. The bag is a wash bag sized holdall which contains three separate zipped compartments inside and four open pockets. The designer originally made it as a bag for crafters to store all their tools as it surprisingly holds a lot but it can be used for anything. You can make it with a pin cushion inside as well but I left out this part.  

The pattern is designed by a blogger Sew Demented (www.sewdemented.com) and can be purchased directly from her website in PDF format. 


The pattern is good and well explained with no fancy terminology so is good for an eager beginner like myself. However the need to attach 4 zippers can easily put people off. The zips were not bad at all and straightforward. I found the binding more tricky and getting the sides attached. 

As it was my first attempt I decided to use left over fabric to make the bag.
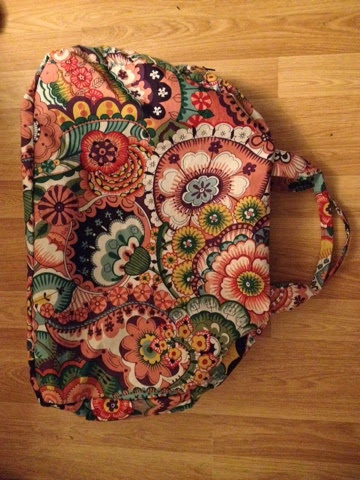
I chose my favourite for the exterior, the Alexander Henry Zahara I had used for my dress previously. Many people go for a theme or coordinating fabrics but I liked the idea of using as many different colours that I had.  

For the side panels I used a yellow floral fabric from Michael Miller and it really stood out from the black and white Zahara. For the inside I used a different design of each compartment. The Red Skulls are by David Textiles Inc, the birds are Alexander Henry Birds of a Feather, the grey witches are The Ghastlies by Alexander Henry and the Racoons are Tula Pink for Free Spirit. 

For the inside of the zip pockets I used the Alexander Henry Sloane left over from making my duffle bag. 

The instructions are very clear, however I managed to initially put my zips on the wrong way which required some unpicking. Then I discovered someone had written a sew along tutorial for the Sew Together Bag. 

Heather at The Quilt Barn had a while ago launched a step by step sew along for the bag which is well illustrated and gives wonder tips on how to manage the tricky parts and can be found here (http://quiltbarn.blogspot.co.uk/?m=1). 
I found these instructions invaluable and highly recommend the website to anyone who wants to attempt the bag. 


When trying to put the bag together I really struggled to get the sides and bottom attached as there was so much fabric for the different compartments I couldn't feed it through the machine. This was even worse when the binding was added and I kept coming off the edge so after many attempts I decided to stitch the rest by hand. This is not the professional look the designer intended but it cured my frustration and got the bag completed. The isn't a gift, just for me so I don't really mind. 

Not sure I will attempt this pattern again in a hurry. The bag is great but not sure I could do the putting together any better. I still love looking through peoples completed bags on Instagram. Maybe next time I have lots of scraps of fabric to use I might reconsider. 

Wednesday, 11 June 2014

Duffle bag


At the same time I purchased the Alexander Henry Zahara print fabric, I also brought his Somerville, Sloane in Sienna. The fabric is really stunning, the picture doesn't do it justice. 


Again, I purchased the fabric with no idea as to what it would become. I initially thought it would make a good t-shirt, but eventually decided on a bag. 

Being a new mum my handbag has gone from a simple clutch with essentials such as phone & keys, to a suitcase full of nappies, spare clothes, wipes bottles etc....
So a bag I would use on a daily basis would need to be large. 

I have had for a while a pattern for a duffle bag, purchased from Etsy. 
The bag looked large and the pattern instructions clear with lots of pictures. 


The Sienna fabric had an aubergine/eggplant base colour so I thought this would be a good lining colour to match. I purchased Moda eggplant solid via www.fabricrehab.co.uk and a matching eggplant zip. 


There was an option of adding inside pockets, but it's not something I use on my current bag so I decided to skip that step. 

The sides of the bag were interfaced and the bottom was batting and quilted. 


The instructions were straightforward to follow. I think I used the wrong material for the base as my bag had a saggy bottom. My dad suggested a sturdy piece of material at the bottom of the bag to stop any sags. I found a plastic folder so I cut a wide strip and placed it between the outer and the lining and the saggy bottom disappeared (thanks dad :). 

The sides were a bit fiddly to attach to the bottom piece and it took a bit of readjusting. I think I may have cut the bottom a little too long, but the instructions explain how to solve the excess material problem. 

I just love the fabric and a large bag shows it off really well I think. Eggplant has become my new favourite colour! I call this my Mary Poppins bag as it is so big inside and the colours remind me of the large carpet bag Julie Andrews uses in the film.  


The pattern includes a child size duffle but I used the adult size, which comes out the size of a weekender bag. 

You can find the pattern on Etsy just search for duffle bag pattern. The seller is ginia18. 


Saturday, 7 June 2014

Baby Crafts

I have an adorable 6 month old daughter. She entertains me everyday and I can not believe how quickly she is growing. So when I decided the start sewing, an item for my daughter was top of the list. 

I searched for a pattern that would be cute but easy and came across Butterick pattern 3405. 


I chose pattern C which is a short top and matching panties. 

The most enjoyable part of making a garment is choosing the fabric. As I have said before I am obsessed with Alexander Henry fabric so it was only right my daughters dress should be made out of something from his collection. 

Alexander Henry is rarely on sale so I was so happy to stumble across the great site www.fondantfabrics.co.uk. Not only did they have a sale, they offer free postage if you spend over £40. 

This is the stash my postman delivered. 


I was very excited when I opened these beauties. The top three metres are all Alexander Henry, the skulls are from David Textiles and the flowers from Michael Miller. Out of the batch I went with the Japanese girls. 


I have always found paper patterns very daunting. I thought the brown tracing patterns and minimal instructions meant they were only to be tackled by professionals. However once I opened the envelope and read through it didn't seem so bad. 

The part I found most difficult to understand was interfacing of the back where the press studs would go. Even though I read the instructions many, many times, I still ended up putting it on the wrong way. But it's ok as you can't see the mistake when she is wearing it. The panties were really easy to construct as well. 

Here's the finished garment. The cuteness of the model helps :) 

As I was on a roll with baby crafts I decided to try a bib. 

A new sewing magazine was launched in April called Love Sewing. 


It was such a successful magazine the company completely sold out of copies. There were so many modern and exciting patterns that I hope to tackle soon but first an easy pattern, the bandana bib. 

There was an actual size template provided and I cut out a pattern fabric front and a fleece for the backing. I used the red skulls fabric from David Textiles and a red fleece for the back. The fleece I used was very thick and so in future I think a thinner fleece or a flannel material. However, the end result still looked good. 


Isn't she gorgeous ❤️ 

I have all of her first baby grows and want to make a quilt out of them. I've got so far as cutting out squares. It won't be an easy first quilt as the baby grows are jersey material so will stretch when sewn, but however it ends up looking the memories will still be there.